Using Pricing Requests
From the Pricing Requests page in RPPS, you can create pricing requests for your relationships.
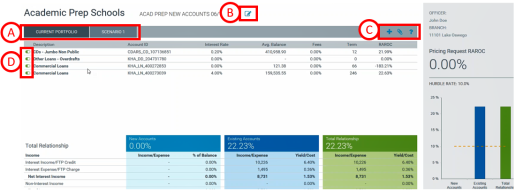
- Tab bar - use these tabs to switch between your current portfolio and any scenarios you create. The first tab is your current portfolio and appears by default.
- Edit name - click this icon to edit the name of your pricing request.
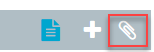
- Create/Attach/Help icons - click these icons to create scenarios, attach documents to your pricing request, or access Axiom RPPS help pages. When you click on a scenario, an Edit Name icon will display in this list. Use that icon to edit the name of the scenario.
- Include/exclude toggle - click this toggle to include or exclude an account from your pricing request.
Creating pricing requests
The process for creating pricing requests varies slightly based on whether a customer relationship already exists or if the customer is new to your institution.
To create a new pricing request for existing customer relationships:
- In the Navigation menu, click My Portfolio.
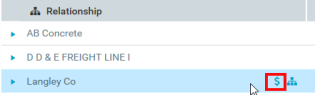
- In the Relationship column, point to the customer relationship you want to create a pricing request for with your mouse pointer.
- Click the dollar sign ($) icon.
- In the dialog, enter a name for your new pricing request in the text box.
-
Click Create.
To create a new pricing request for new customers:
- In the Navigation menu, click My Portfolio.
- Click the dollar sign at the upper-right of the page.

- In the dialog, enter a name for your new pricing request in the text box.
- Click Create. This will open a blank customer portfolio.
TIP: You will need to create a new scenario and add new accounts individually. For more information about managing scenarios, see Managing scenarios.
Opening pricing requests
To open existing pricing requests:
- On the My Portfolio page, in the Relationship column, click the desired customer relationship.
-
Click the dollar sign ($) icon.
- Under Open Requests, click the name of the pricing request you want to open.
To create a scenario, click the + icon to the right of the scenario tab list. RPPS will automatically populate the new scenario.
To include or exclude listed accounts from your scenario, click the toggle icon in the Description column.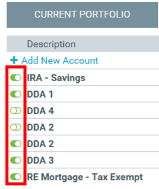
To add a new account to a scenario:
- Click a scenario tab.
- Click + Add New Account in the Description column.
- Select from the drop-down menus to assign a customer, product type, product, and interest type to the account.
- Click Add.
Managing file attachments
To attach files:
-
Click the paperclip icon to the right of the scenario list.
-
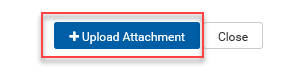
Click Upload Attachment.
- Click the file you want to attach.
- Click Open
To review, manage, or delete attached files:
-
Click the paperclip icon to the right of the scenario list.
- Point to the attachment name with your mouse pointer.
-
On the icon list, click the download icon to download the attachment, the edit icon to edit the attachment name and/or add a description, or the trash can icon to delete the attachment.
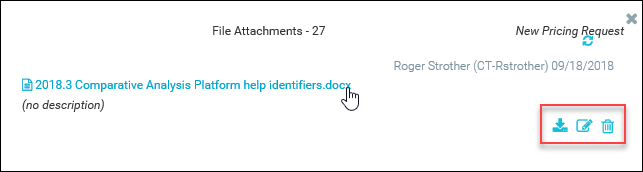
- Click Close.
Submitting pricing requests
NOTE: You will need to create two or more scenarios before you have the option to submit a pricing request. For more about creating scenarios, see Managing scenarios.
To compare and submit a pricing request:
- For pricing requests with two or more scenarios, click Compare at the upper-right of the page.
-
View the side-by-side comparison, then click Submit this Scenario from the scenario column to submit.

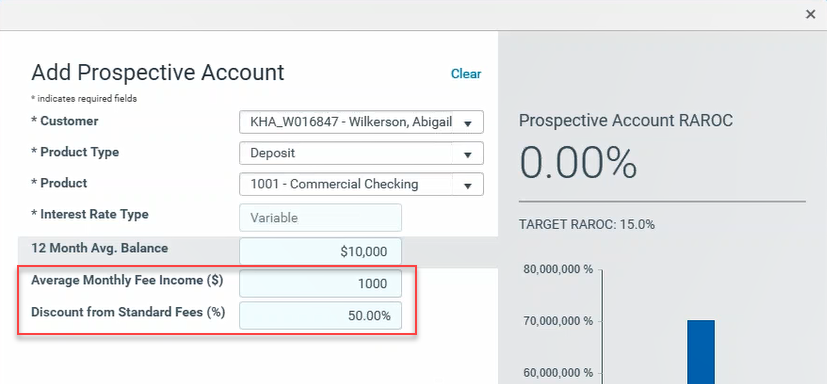
Entering fee income and discount rates
The Relationship Manager can enter a fee amount and the discount rate for prospective accounts (typically deposits). The fee amount is included in non-interest income and the transaction expense is calculated by grossing up the entered fee income by the discount rate. That amount is multiplied by the Standard Pricing Rate to determine the transaction expense.
Your system administrator sets the expense rate in the Expense Allocation section under the Standard Pricing Expense Rate.
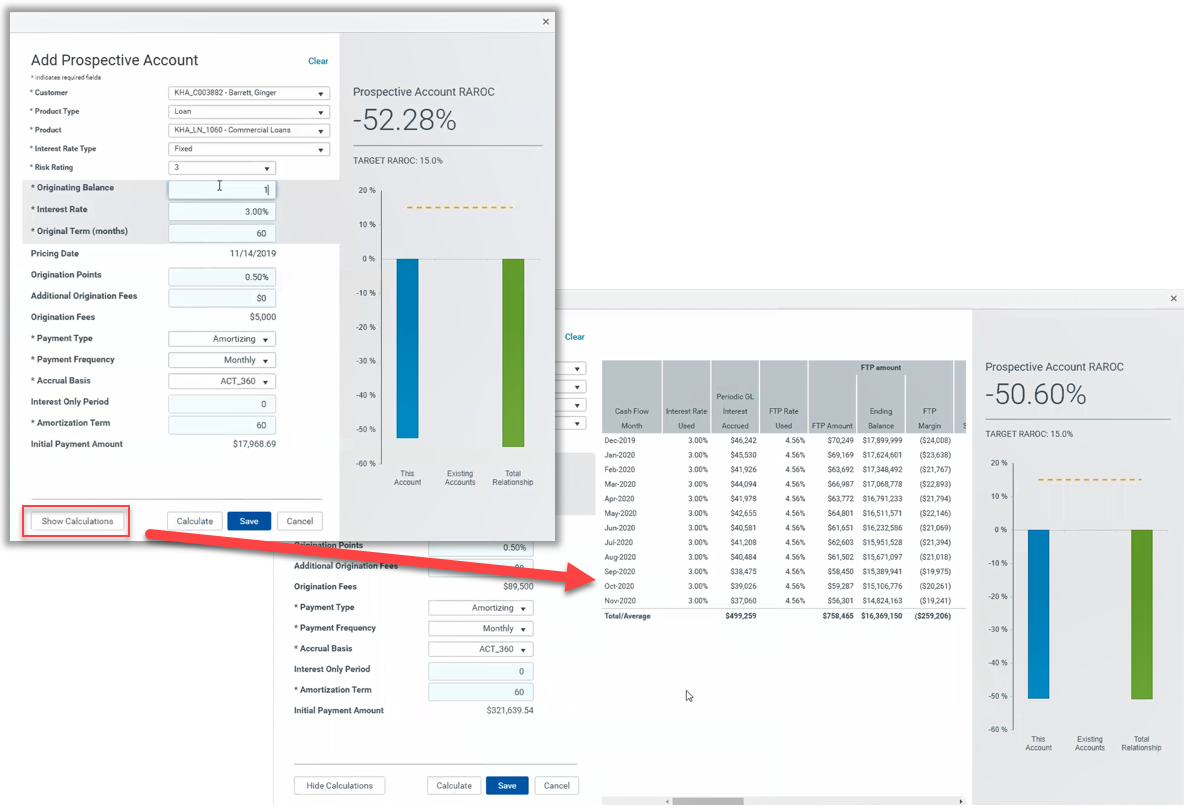
Viewing calculations while adding prospective accounts
The Calculate function in the Add Prospective Account display allows you to execute calculations on numbers after you type them in the blue text boxes. This enhancement enables you to quickly tab between fields when entering data.
NOTE: RPPS executes calculations automatically when you select an option from a drop-down, but you must click Calculate at the bottom of the display to execute calculations on data that you type in. These calculations update the data displayed in the right-hand side of the display.
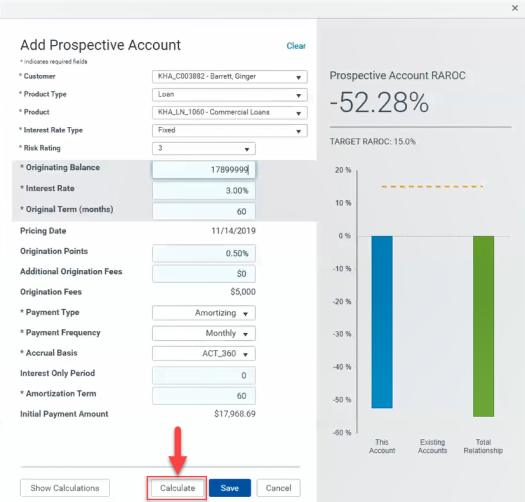
Click Show Calculations to update the calculations and display the calculations in a spreadsheet format.